Showing posts with label Envelope Punch Board. Show all posts

Friday, April 5, 2019

Blogging Friends Blog Hop

Image may contain: outdoor 

Hello my stampin' friends,

It is time for another great blog hop with my Blogging Friends and we have a fun theme for April : Easter!

First, if I could share a few proud mom moments.  My oldest won his university championship hockey game, he is the goalie, he played awesome and they walked away with the cup!  My middle got the game winning goal in his soccer game and my youngest got 4 goals in 3 games and his team won their championship too!  All of this in one week.  Pretty awesome!


 Now the real reason you stopped by, my Easter project!  I just love making treat holders and Easter is the perfect time to make them.  Stampin'UP! has two awesome bunny stampsets and even a punch right now, but this girl didn't get either of them in time to create this Easter project!  that will be rectified on my next order.  lol


There are many wonderful tools and stampsets to create some treatholders and lots of amazing spring colours and designer series papers that will help give the Easter feel.

I used Highland Heather Pear Pizzaz and Whisper white colours to create the spring feel. I used the uber popular Gingham Gala DSP which has already sold out once, but is back in stock just in time for those Easter Treats.


I used my envelope punch board to create an evenlope, I turned it onto it's side and glued only three of the sides, leaving the top open for the treat to be able to slide in.

I wrapped a belly band around it to help hide the edges.  it did take two strips of the DSP to wrap all the way around.  The Gingham Gala DSP is only 6x6.

To create the tag, I used my Layering Circles and Stitched Shapes framelits.  I stamped my images and greeting in Momento Ink so that I could colour those little jelly beans with my Stampin' Blends.  I cut it out using the coordinating framelits.


And here are the treats that i put inside and where I got my colour choices from! 

Happy Stampin'

Tammy


Saturday, June 28, 2014

A Gift for ME!

Hello there!  Happy first day of summer break!  My now six year old woke up extra extra early today....6:15 am!  (I couldn`t wake him up at this time for school if I tried)  and he was yelling It's SUMMER from his bed!  Can you believe it!  What a way to wake up.  My baby just loves his time off from school WAY too much  lol

My post today is an awesome surprise that was given to me this week at my card class.  A beautiful present for ME! 

A wonderful lady, Laurie MacIntosh, has become a good friend because of Stampin'UP! and she made me this thank you gift.  Wait until you see it - WOW!  My pictures won`t do it justice, but I will try.

Laurie made this beautiful box with a cute belly band - I couldn't wait to get it open.


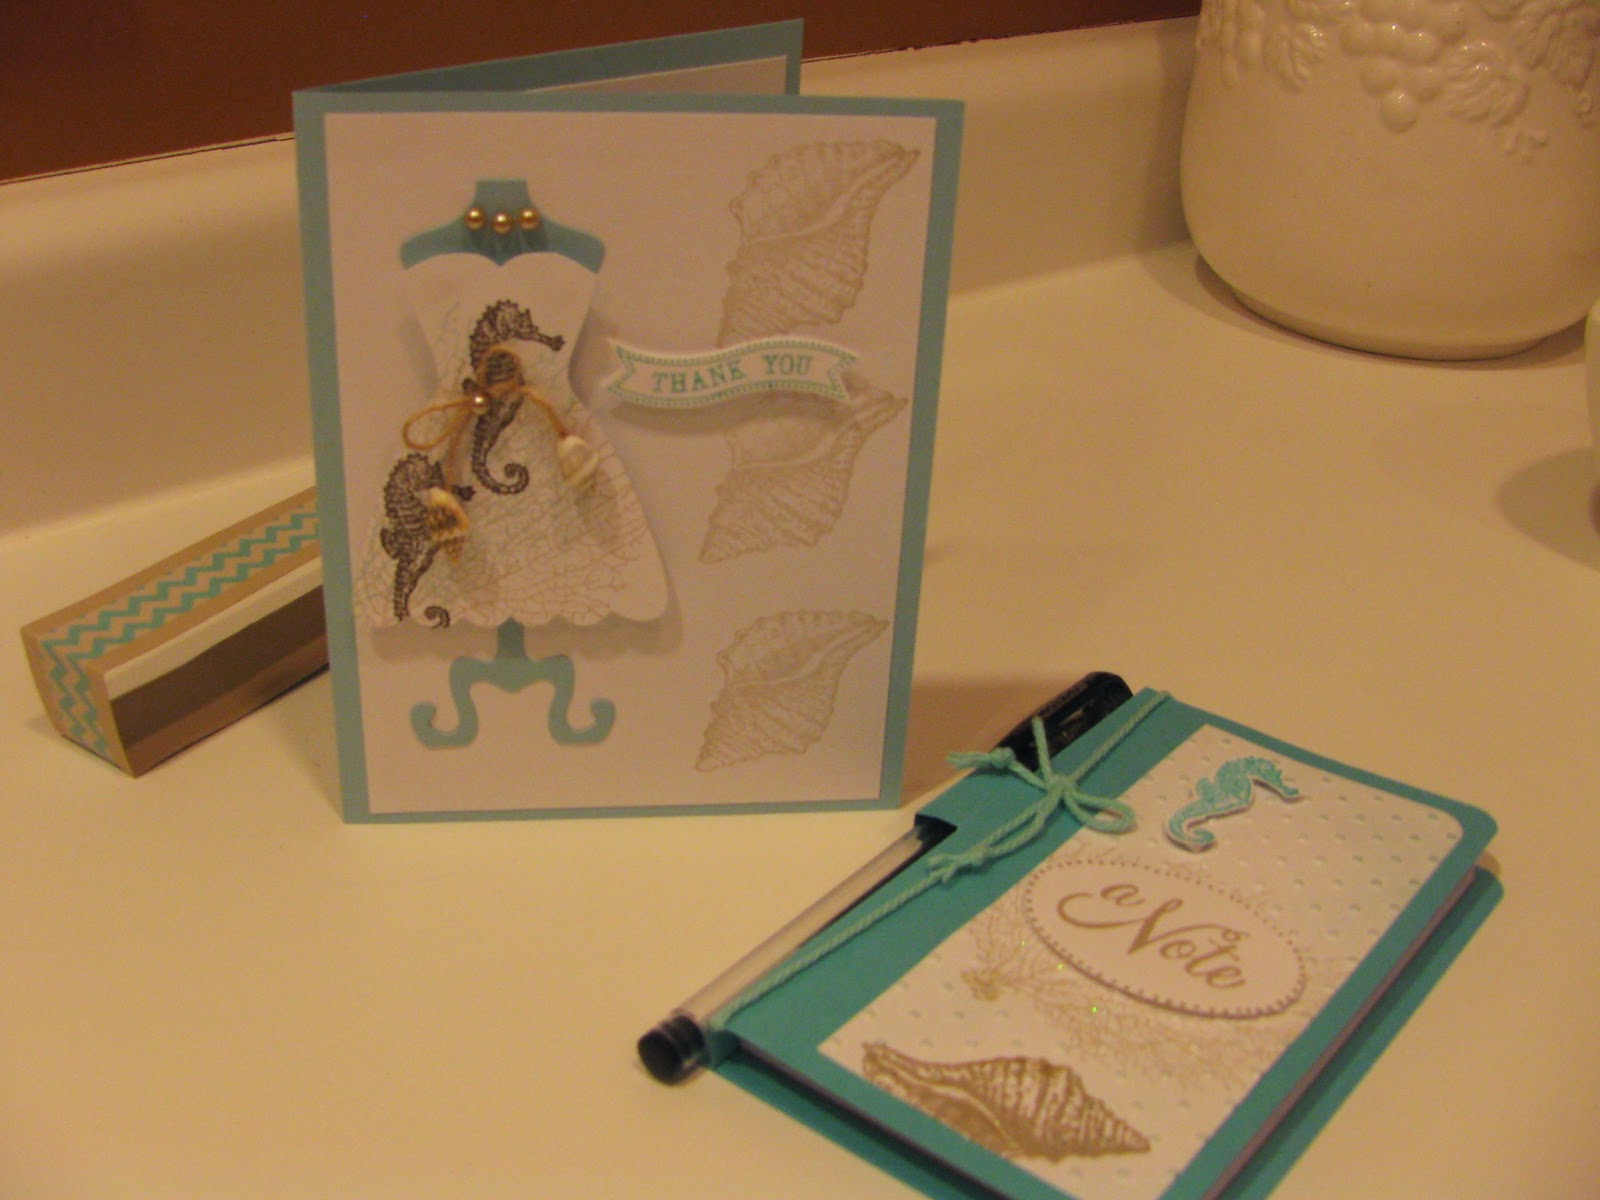
Inside, I found this  beautiful note pad and pen - perfect for all those lists that a mom needs to make.


Here is a close up.  Laurie embossed the whisper white background using perfect poka dots embossing folder and her big shot.  She used the stamp set By the Tide and fussy cut the shell and seahorse and popped them up on dimensionals.  The coral was stamped directly onto the white, before it was embossed and the greeting was a stamp from her collection and punched out with an oval punch.  Don`t forget that new Thick Baker`s Twine.  You can't see it but there is some dazzling details on there as well!  Gorgeous!


Below is the card that she made.  It had a matching envelope that she made using the envelope punch board  - an awesome tool to have!

Isn`t this card beautiful!  The dress and dress form are retired framelits.  The dress is popped up and decorated with By the Tide stampset.  Can you see the little bow made with twine.....there are tiny little sea shells on the ends! 

The thank you greeting comes from Itty Bitty Banners set and matching framelits!


Thank you Laurie for this thoughtful and oh so BEAUTIFUL gift!

Happy Stampin`,

Tammy

Monday, January 20, 2014

Envelope Punch Board and Scrapbook Page

Hello there my Stampin' friends.

Thank you for stopping by today.  I have a scrapbook page to show you today.  There are so many great tools used on this page and I am happy with how it turned out! 

I have been working on my Christmas layouts....I know, I know we are all probably sick of doing Christmas projects........but Scrapbook pages just need to be done!  I hope I am not the only one still catching up with that!

I just had to capture this memory for my family.  My youngest son had made some 'Reindeer food' at school to sprinkle on our lawn / snow pile so Santa can find our house on Christmas eve! 

My son was SO excited about it and we had to make sure we put it out before he went to bed.  Thank you to one of the best Kindergarten teachers, Mrs. Haufe, who does all of these wonderful extras for our kids! 


This was the PERFECT opportunity to use the Envelope Punch Board on my scrapbook page.  I wanted to keep the tag that came with the 'food' that had a cute little saying and instructions.  With the Envelope Punch Board you can make an envelope of ANY size!

Here is the list of supplies I used....

Season of Style DSP
Old Olive Cardstock
Cherry Cobbler Cardstock
Crumb Cake Cardstock
Ornament Keepsakes Framelites
Tasteful Trim Bigz Die
Envelope Punch Board
1/2 Circle Punch
Cherry Cobbler Baker's Twine
Cherry Cobbler Ribbon
Rhinestones

Happy Stampin'

Tammy